Valve covers — removal and installation
Removal
1. Disconnect the cable from the negative terminal of the battery (see Engine electrical systems).
2. Disconnect the PCV hose quick connect fitting from the valve covers (see illustration).
4.2 Disconnect the electrical connectors (1) to the ignition coils, then disconnect the PCV hose quick connector (2) — left side shown, right side similar

3. On the left valve cover remove the oil filler cap (see illustration).
4.3 Remove the oil filler cap

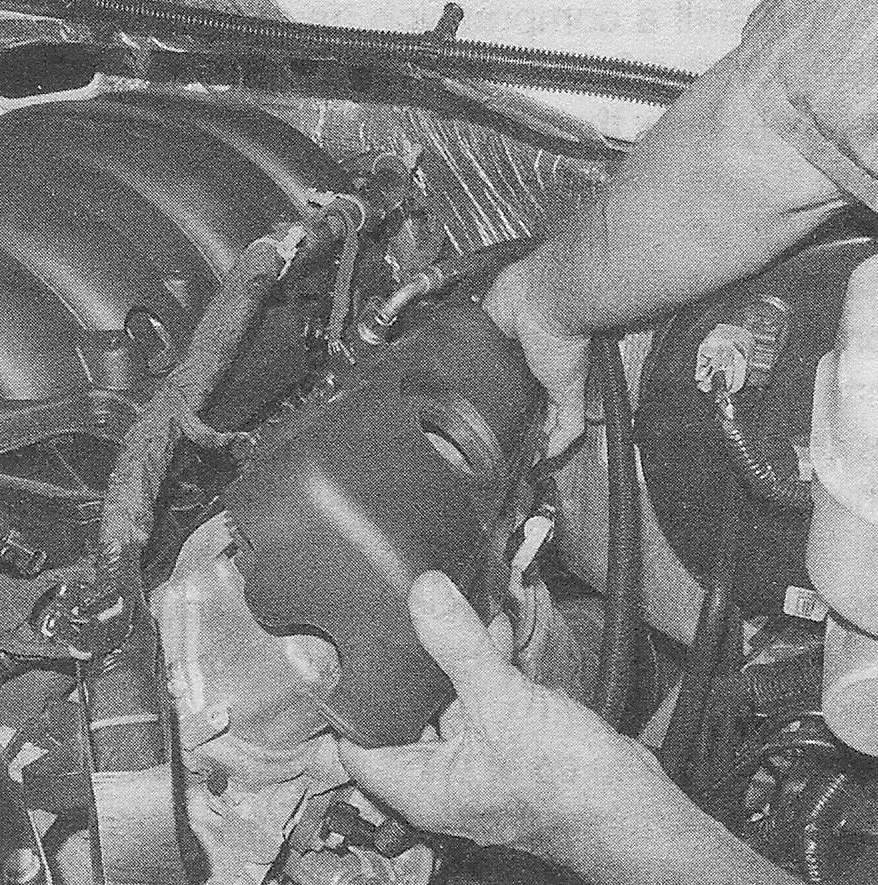
4. Pull the valve cover insulator off the valve cover (see illustration).

5. If you’re removing the left-side valve cover, remove the oil dipstick tube mounting bolt and pivot the tube out of the way.
6. If you’re removing the right-side valve cover, remove the air intake duct (see Fuel and exhaust systems).
7. Disconnect the spark plug wires from the coils by first twisting them a half turn to loosen them. Pull only on the boot — not on the wire.
8. Remove the ignition coils (see Engine electrical systems).
9. Disconnect the interfering engine wiring harnesses and move them aside.
10. Remove the valve cover bolts, then detach the cover from the cylinder head.
Note: If the cover is stuck to the cylinder head, bump one end with a block of wood and a hammer to jar it loose. If that doesn’t work, try to slip a flexible putty knife between the cylinder head and cover to break the gasket seal. Don’t pry at the cover-to-head joint or damage to the sealing surfaces may occur (leading to oil leaks in the future).
Installation
11. The mating surfaces of each cylinder head and valve cover must be perfectly clean when the covers are installed. Use a gasket scraper to remove all traces of sealant and old gasket material, then clean the mating surfaces with brake system cleaner. If there’s sealant or oil on the mating surfaces when the cover is installed, oil leaks may develop.
12. Clean the mounting bolt threads with a die to remove any corrosion and restore damaged threads. Make sure the threaded holes in the cylinder head are clean — run a tap into them to remove corrosion and restore damaged threads.
13. Position the gasket inside the cover lip. If the gasket will not stay in place in the cover lip, apply a thin coat of RTV sealant to the cover flange, then allow the sealant to set up so the gasket adheres to the cover.
14. Tighten the bolts a little at a time, starting with the center bolts and working outward, to the torque listed in this Chapter’s Specifications.
15. The remainder of installation is the reverse of removal. Use thread locking mate-
rial on the ignition coil bracket studs and nuts.
16. Start the engine and check carefully for oil leaks as the engine warms up.