Valve springs, retainers and seals — replacement
Note: Broken valve springs and defective valve stem seals can be replaced without removing the cylinder heads. Two special tools and a compressed air source are normally required to perform this operation, so read through this Section carefully and rent or buy the tools before beginning the job.
1. Remove the valve cover from the cyclin der head (see Valve covers — removal and installation). If all of the valve stem seals are being replaced, remove both valve covers.
2. Remove the spark plug from the cylinder which has the defective component. If all of the valve stem seals are being replaced, all of the spark plugs should be removed.
3. Turn the crankshaft until the piston in the affected cylinder is at Top Dead Center on the compression stroke. If you are replacing all of the valve stem seals, begin with cylinder number 1 and work on the valves for one cylinder at a time. Move from cylinder-to-cylinder following the firing order sequence (1-6-5-4-3-2). Each cylinder in the firing order is 120-degrees of crankshaft rotation (clockwise) from the previous one.
4. Remove all of the rocker arms, pushrods and support bar from the cylinder head on which you’re working.
5. Thread an adapter into the spark plug hole (see illustration) and connect an air hose from a compressed air source to it. Most auto parts stores can supply the air hose adapter.
6.5 Use compressed air to hold the valve closed when the springs are removed — the air hose adapter (arrow) threads into the spark plug hole and accepts the hose from the compressor

Note: Many cylinders compression gauges utilize a screw-in fitting that may work with your air hose quick-disconnect fitting.
6. Apply 90 to 100 psi of compressed air to the cylinder. The valves should be held in place by the air pressure.
Warning: If the cylinder isn’t exactly at TDC, air pressure may cause the engine to rotate. Do not leave a socket or wrench on the vibration damper bolt; damage or personal injury may result.
7. Stuff shop rags into the cylinder head holes to prevent parts and tools from falling into the engine, then use a valve spring compressor to compress the valve spring and the valve spring retainer. Remove the keepers with small needle-nose pliers or a magnet (see illustration).
6.7 Once the spring is depressed, the keepers can be removed with a small magnet or needle-nose pliers (a magnet is preferred to prevent dropping the keepers)

8. Remove the spring retainer or rotator and valve spring assembly (on some models there is both an inner and outer valve spring for each valve — the inner is called a spring damper), then remove the valve stem seal from the valve guide.
Note: If air pressure fails to hold the valve in the closed position during this operation, the valve face and/or seat is probably damaged. If so, the cylinder head will have to be removed for additional repair operations.
9. Wrap a rubber band or tape around the top of the valve stem so the valve won’t fall into the combustion chamber, then release the air pressure.
10. Inspect the valve stem for damage. Rotate the valve in the guide and check the end for eccentric movement, which would indicate that the valve is bent.
11. Move the valve up-and-down in the guide and make sure it does not bind. If the valve stem binds, either the valve is bent or the guide is damaged. In either case, the cylinder head will have to be removed for repair.
12. Reapply air pressure to the cylinder to retain the valve in the closed position, then remove the tape or rubber band from the valve stem.
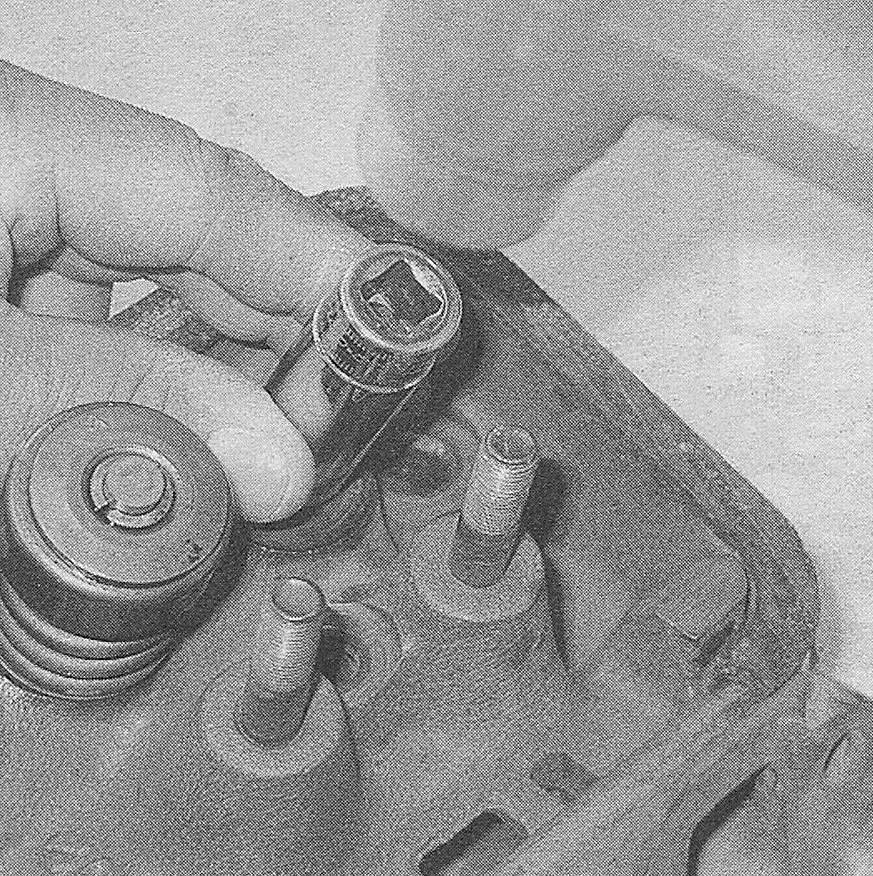
13. Lubricate the valve stems with engine oil and install the new valve stem seals. Using the stem of the valves as a guide, slide the seals down to the top of each valve guide, then use a hammer and a deep socket or seal installation tool to gently tap each seal into place until it’s positioned to the specified depth (see illustration).
6.13 Using a deep socket and hammer, gently tap the new seals onto the valve guide — don’t bottom the seal against the valve guide

14. Install the valve spring and damper (if equipped) over the valve, with the more closely-wound spring coils toward the cylinder head.
15. Install the valve spring retainer or rotator. Compress the valve springs and carefully position the valve stem keepers in the groove. Apply a small dab of grease to the inside of each keeper to hold it in place (see illustration).
6.15 Apply a small dab of grease to each keeper as shown here before installation — it will hold them in place on the valve stem as the spring is released

16. Disconnect the air hose and remove the adapter from the spark plug hole.
17. Repeat the above procedure on the remaining cylinders, following the firing order sequence (see the Specifications). Bring each piston to Top Dead Center on the compression stroke before applying air pressure.
18. Install the rocker arms, support bars and pushrods (see Rocker arms and pushrods — removal, inspection and installation).
19. Install the valve cover (s) (see Valve covers — removal and installation).
20. Install the spark plug (s) and hook up the wire(s).
21. Start and run the engine, then check for oil leaks and unusual sounds coming from the valve cover area.