Throttle body — inspection, removal and installation
Inspection
1. Remove the air intake duct from the throttle body, open the throttle plate and inspect the throttle body bore for carbon and residue build-up. If it’s dirty, clean it with solvent or carburetor cleaner. Make sure that the solvent or carb cleaner is safe for oxygen sensor systems and catalytic converters.
Caution: Do not clean the Throttle Position (TP) sensor or the throttle motor with solvent. Also, do NOT use a metal brush to clean the bore of the throttle body, which is protected by a special coating. Scrubbing the bore with a stiff brush could ruin the coating. Instead, wipe out the bore with a clean shop rag and a little carburetor cleaner.
Removal and installation
Warning: Wait until the engine is completely cool before beginning this procedure.
Note: The photos accompanying this section depict the throttle body on a V6 model, but the throttle body used on V8 models is virtually identical, except that it’s mounted on top of the intake manifold instead of the front of the manifold.
2. Remove the air intake duct (see Air intake duct and air filter housing — removal and installation).
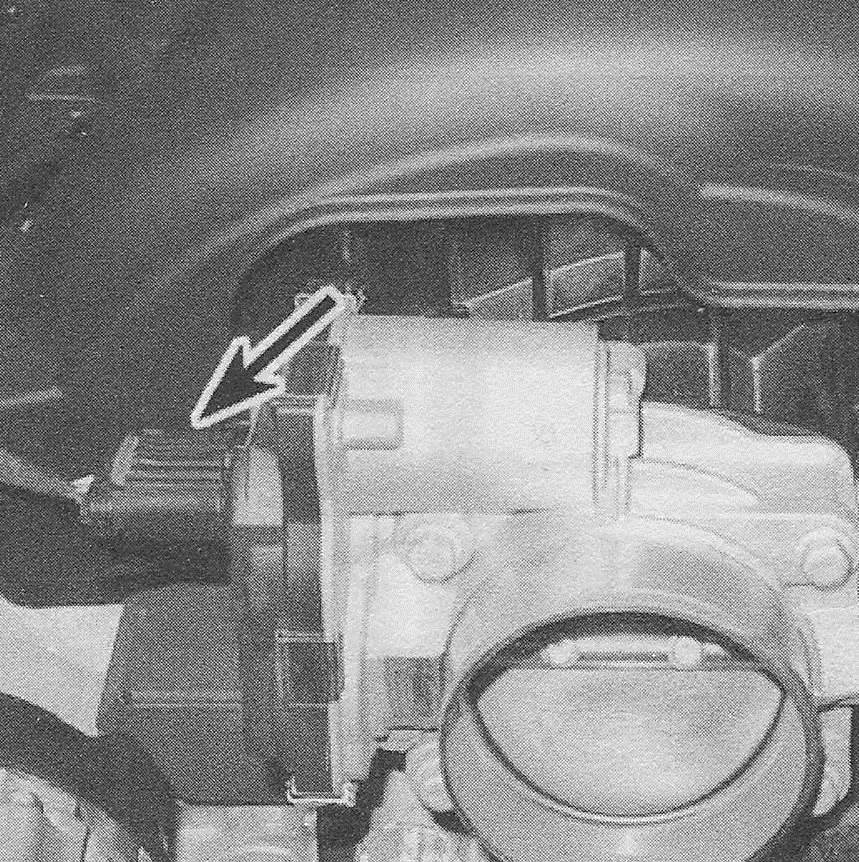
3. Pull out the lock, then depress the release tab and pull off the electrical connector for the throttle body (see illustration).
13.3 Disconnect the throttle body electrical connector

4. Remove the throttle body mounting fasteners (see illustration) and remove the throttle body.
13.4 To detach the throttle body from the intake manifold, remove the four fasteners

5. Remove the old throttle body 0-ring gasket and discard it.
6. Installation is the reverse of removal. Be sure to use a new gasket and tighten the throttle body mounting fasteners to the torque listed in this Chapter’s Specifications.
7. Start the engine, then verify that the throttle body operates correctly and that there are no air leaks.