Fuel rail and injectors — removal and installation
Note: Even if you only removed the fuel rail assembly to replace a single injector or a leaking 0-ring, it’s a good idea to remove all of the injectors from the fuel rail and replace all of the 0-rings at the same time.
1. Relieve the fuel system pressure (see Fuel pressure relief procedure).
2. Disconnect the cable from the negative battery terminal (see Engine electrical systems).
3. Remove the air intake duct (see Air intake duct and air filter housing — removal and installation).
Non-6.0L models
Warning: The fuel delivery system is made up of a low-pressure system and a high-pressure system. Once the pressure on the low-pressure side of the system has been relieved, wait at least two hours before loosening any fuel line fittings in the engine compartment. Caution: The manufacturer recommends replacing all of the seals on the injectors whenever they are removed from the cylinder head.
4. Remove the intake manifold (see V6 engine or V8 engines).
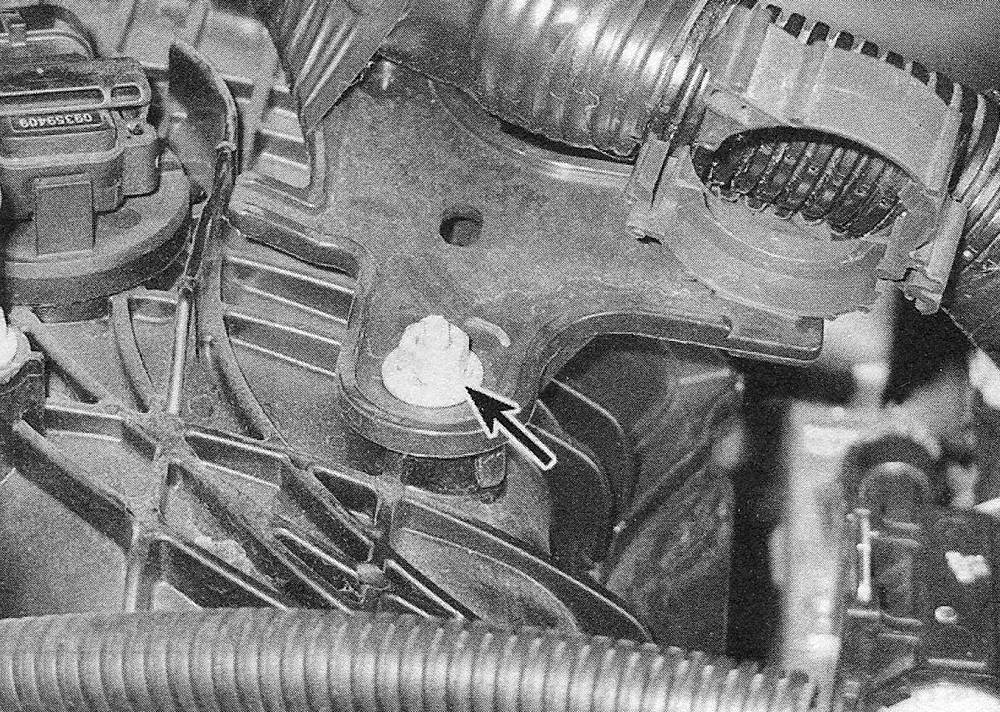
5. Remove the fuel pump/fuel rail insulator (see illustration).
14.5 Remove the foam insulator covering the injector rails

6. Remove the fuel feed and high-pressure fuel line from the pump and fuel rails (see illustration).
7. Disconnect the fuel injector electrical connectors and position the harness out of the way.
8. Remove the mounting bolts from both fuel rails (see illustration).
14.8 Remove the following items in order:
A Fuel rail fuel pressure sensor electrical connector
B Fuel feed line
C High-pressure fuel lines
D Fuel rail bolts

9. Install the center bolts, leaving several threads exposed, then evenly pry the driver’s side fuel rail and injectors out of the cylinder head. Repeat the same procedure for the other fuel rail.
10. Using external snap-ring pliers, carefully spread the retaining clip open, then remove the clip (see illustration).
14.10 Use snap-ring pliers to open up the retaining clip, then remove it

11. Remove each injector from the fuel rail (see illustration).
14.11 Remove the injectors from the fuel rail

12. Remove the old combustion chamber Teflon sealing ring and the upper 0-ring and support ring from each injector (see illustration).
14.12 To remove the Teflon sealing ring, cut it off with a hobby knife (be careful not to scratch the injector groove)

Caution: Be extremely careful not to damage the groove for the seal or the rib in the floor of the groove. If you damage the groove or the rib, you must replace the injector.
13. Before installing the new Teflon seal on each injector, thoroughly clean the groove for the seal and the injector shaft. Remove all combustion residue and varnish with a clean shop rag.
Teflon seal installation using the special tools
14. The manufacturer recommends that you use the tools included in the special injector tool set described above to install the Teflon lower seals on the injectors: Install the special seal assembly cone on the injector, install the special sleeve on the injector and use the sleeve to push on the assembly cone, which pushes the Teflon seal into place on its groove. Do NOT use any lubricants to do so.
15. Pushing the Teflon seal into place in its groove expands it slightly. There is a two-sided sizing sleeve in the special tool set with two different inside diameters. Using a clockwise rotating motion of about 180 degrees, install the slightly larger sleeve onto the injector and over the Teflon seal until the sleeve hits its stop, then carefully turn the sleeve counterclockwise as you pull it off the injector. Use the slightly smaller sizing sleeve the
same way. The seal is now sized. Repeat this step for each injector.
Teflon seal installation without special tools
16. If you don’t have the special injector tool set, the Teflon seal can be installed using this method: First, find a socket that is equal or very close in diameter to the diameter of the end of the fuel injector.
17. Work the new Teflon seal onto the end of the socket (see illustration).
14.17 Slide the new Teflon seal onto the end of a socket that’s the same diameter as the end of the fuel injector…

18. Place the socket against the end of the injector (see illustration) and slide the seal from the socket onto the injector. Do NOT use any lubricants to do so. Continue pushing the seal onto the injector until it seats into its mounting groove.
14.18. …align the socket with the end of the injector and slide the seal onto the injector and into its mounting groove

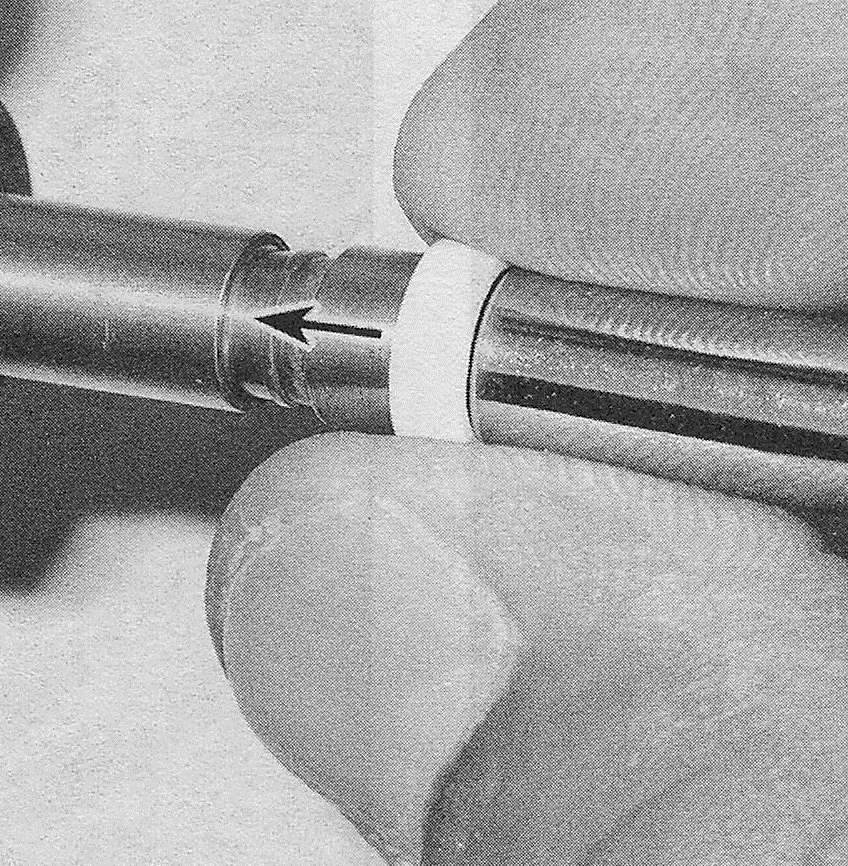
19. Because the inside diameter of the seal has to be stretched open to fit over the bore of the socket and the injector, its outside diameter is now slightly too large — it is no longer flush with the surface of the injector. It must be shrunk it back to its original size. To do so, push a piece of plastic tubing with an interference fit onto the end of the socket; a plastic straw that fits tightly on the injector will work. After pushing the plastic tubing onto the socket about an inch, snip off the rest of the tubing, then use the socket to push the tubing onto the end of the injector (see illustration) and slide it onto the injector until it completely covers the new seal (see illustration). Leave the tubing on for a few hours, then remove it. The seal should now be shrunk back to its original outside diameter, or close to it.
14.19a Use the socket to push a short section of plastic tubing onto the end of the injector and over the new seal…

14.19b. …then leave the plastic tubing in place for several hours to compress the new seal Injector and fuel rail installation

20. Install the new support ring at the upper end of the injector. Lubricate the new upper 0-ring with clean engine oil and install it on the injector. Do NOT oil the new Teflon seal. Note that the seal is installed above the spacer (see illustration).
14.20 Note that the upper 0-ring (1) is installed above the support ring (2)

21. Thoroughly clean the injector bores with a small nylon brush.
22. Install the new compensation element and retaining ring to the bottom of each injector.
23. Install the fuel injectors in the fuel rail and secure them with new retainers, then install the fuel rail and injectors. The bores in the cylinder head are slightly tapered, so you will encounter some resistance as the Teflon seal nears the bottom of the bore.
24. Apply a drop of non-hardening thread locking compound to the fuel rail bolts. Install the bolts, tightening them alternately until they are seated, then tighten them to the torque listed in this Chapter’s Specifications.
25. The remainder of installation is the reverse of removal. Clean the high-pressure fuel line fittings on the fuel rails, then apply a little clean engine oil to the threads. Install the new high-pressure fuel line, tightening the fittings to the torque listed in this Chapter’s Specifications. Install a new fuel rail fuel pressure sensor (see High pressure fuel pump and fuel rail fuel pressure sensor — removal and installation).
6.0L models
26. Remove the intake manifold cover.
27. Relieve the fuel system pressure (see Fuel pressure relief procedure).
28. Disconnect the cable from the negative battery terminal (see Engine electrical systems).
29. Remove the air intake duct (see Air intake duct and air filter housing — removal and installation).
30. Remove the intake manifold cover bracket bolts (see illustration) and remove the manifold cover bracket.
14.30 To detach the intake manifold cover bracket, remove these three bolts

31. Remove the nut that secures the engine wiring harness bracket to the intake manifold (see illustration) and detach the harness bracket.
14.31 To detach the engine wiring harness bracket, remove this nut

32. Trace each electrical lead in the engine wiring harness to its corresponding electrical connector and disconnect the electrical connectors from the following components:
a) Alternator (see Engine electrical systems) — also detach the engine wiring harness clip from the alternator
b) EVAP purge solenoid (see Emissions and engine control systems)
c) Ignition coils (see Engine electrical systems) Manifold Absolute Pressure (MAP) sensor (see Emissions and engine control systems)
d) Throttle body (see Throttle body — inspection, removal and installation)
33. Disconnect the electrical connectors from the fuel injectors (see illustration).
14.33 To disconnect the electrical connector from each fuel injector, pull up the retainer, then depress the lower end of the retainer and pull off the connector

34. Detach all engine wiring harness clips (including the clip on the alternator) and set the engine wiring harness aside.
35. Disconnect the PCV crankcase ventilation hose (PCV hose) from the intake manifold (see illustration) and set the PCV hose aside.
14.35 To detach the PCV hose from the intake manifold, grasp it firmly and pull it straight up

36. Disconnect the fuel line from the fuel rail (see illustration).
14.36 Disconnect the fuel supply line quick-connect fitting at the fuel rail (if you’re unfamiliar with metal-collar type quick-connect fittings, see Fuel pump / fuel pressure — check).

37. Disconnect the EVAP canister purge solenoid from the intake manifold and remove it from the fuel rail (see Emissions and engine control systems).
38. Remove the fuel rail mounting bolts (see illustration).
14.38 To detach the fuel rail, remove the four mounting bolts (two bolts on right side fuel rail shown)

39. Carefully disengage the injectors from the intake manifold and lift the fuel rail and all six injectors from the engine as a single assembly (see illustration).
14.39 Disengage the fuel injectors from the intake manifold, then lift the fuel rail and the injectors as a single assembly

40. Remove each injector retainer (see illustration) and remove the injectors from the fuel rail.
14.40 Pull off each injector retaining clip with needle nose pliers, then pull the injector out of the fuel rail

41. Remove and discard the old injector 0-rings (see illustration). Always install new 0-rings on the injectors before reassembling the injectors and the fuel rail.
14.41 Remove the 0-rings from each fuel injector, then install new 0-rings. Coat the 0-rings with a little clean engine oil to protect them from damage

42. To ensure that the new injector 0-rings are not damaged when the injectors are installed into the fuel rail and into the intake manifold, lubricate them with clean engine oil.
43. When installing the injector retainers, make sure that they’re aligned properly and fit tightly (see illustration). If a retainer is damaged, replace it.
14.43 When installing each injector retainer, make sure that it’s aligned properly and fits tightly

44. Installation is otherwise the reverse of removal. Be sure to tighten the fuel rail mounting bolts to the torque listed in this Chapter’s Specifications.
45. Turn the ignition key to the on position to pressurize the fuel system and verify that there are no fuel leaks.