Steering gear — removal and installation
Warning: DO NOT allow the steering column shaft to rotate with the steering gear removed or damage to the airbag system could occur. As a method of preventing the shaft from turning, wrap the seat belt around the rim of the steering wheel and buckle the belt in place. Caution: Solid state electronic components are very susceptible to electrostatic discharge. Handle the assembly with care to avoid damaging the steering control module. To be safe, cover any exposed electrical connectors with tape while removing the assembly.
Note: The manufacturer recommends using new steering gear mounting bolts whenever they are removed.
1500 pick-ups and SUV models (rack-and-pinion steering gear)
1. Loosen the front wheel lug nuts, raise the front of the vehicle and support it securely on jack stands. Apply the parking brake. Remove the wheels.
2. Remove the under-vehicle splash shield.
Also remove the skid plate bolts and the skid plate, if equipped. Refer to Stabilizer bar, bushings and links (front) — removal and installation in this chapter for the stabilizer bar removal.
3. Mark the relationship of the intermediate shaft coupler to the steering gear input shaft and remove the pinch bolt.
4. Detach the tie-rod ends from the steering knuckles (see Tie-rod ends — removal and installation).
5. Disconnect the steering gear electrical connectors and free the harness from any wire retainers.
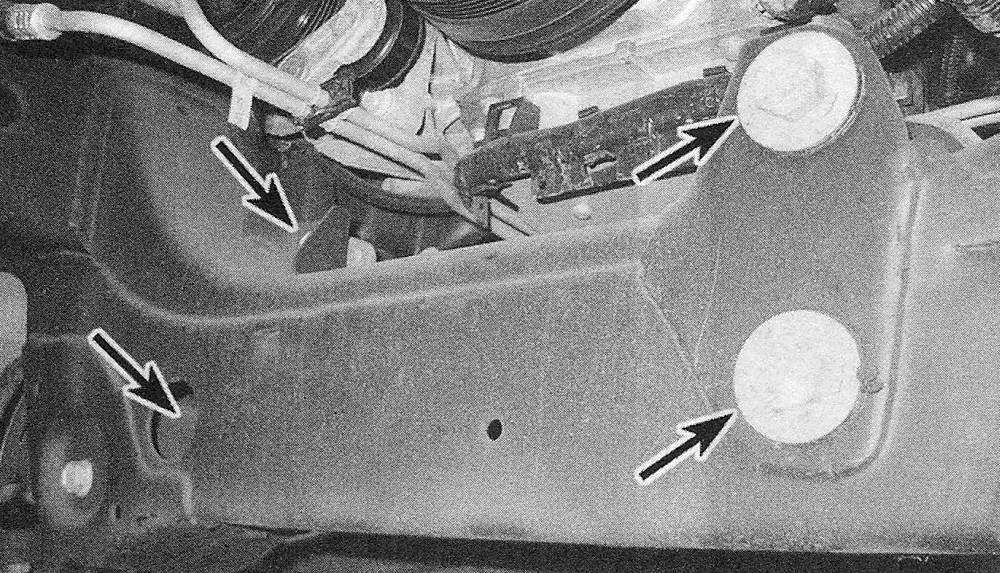
6. Unscrew the mounting bolts (see illustration).
22.6 Steering gear mounting fasteners

7. Lower the steering gear from the vehicle.
Note: Slide the steering gear as far to the right as possible, then when the left tie-rod end clears, tilt the entire unit downward and remove it from the vehicle.
8. Installation is the reverse of removal. Be sure to tighten all fasteners to the torque values listed in this Chapter’s Specifications. Tighten the wheel lug nuts to the torque listed in the Tune-up and routine maintenance Specifications.
9. Have the front-end alignment checked and, if necessary, adjusted.
2500/3500 pick-ups (recirculating-ball steering gear)
10. Raise the front of the vehicle and support it securely on jack stands. Apply the parking brake.
11. Remove the under-vehicle splash shield. Also remove the skid plate bolts and the skid plate, if equipped.
12. Mark the relationship of the intermediate shaft coupler to the steering gear input (stub) shaft, then remove the pinch bolt from the coupler.
13. Position a drain pan under the steering gear. Using a flare-nut wrench, unscrew the power steering lines from the steering gear.
14. Separate the relay rod from the Pitman arm (see Steering gear — removal and installation).
15. Remove the steering gear retaining bolts from the frame rail, then detach the steering gear from the frame and remove it.
16. If you’re installing a new steering gear or a new Pitman arm, remove the Pitman arm from the steering gear sector shaft (see Steering gear — removal and installation).
17. Installation is the reverse of removal. Be sure to tighten all fasteners to the torque values listed in this Chapter’s Specifications. Check the power steering fluid level and add some, if necessary, then bleed the system.