Water pump — replacement
Warning: Wait until the engine is completely cool before beginning this procedure.
1. Disconnect the cable from the negative terminal of the battery (see Engine electrical systems).
2. Drain the coolant (see Tune-up and routine maintenance). Remove the air intake duct and resonator assembly (see Fuel and exhaust systems).
3. Remove the drivebelt (see Tune-up and routine maintenance).
4.3L V6, 5.3L and 6.2L V8 engines
4. Center the water pump pulley holes over the water pump mounting bolts (see illustration), then remove the water pump mounting bolts.
7.4 Water pump mounting bolt locations — coolant manifold removed for clarity

5. Remove the water pump and gasket from the coolant manifold.
6.0L V8 engines
6. Remove the fan and fan clutch (see Rocker arms and pushrods — removal, inspection and installation).
7. Remove the water pump inlet hose (see illustration).
7.7 Location of the upper radiator hose on the water pump

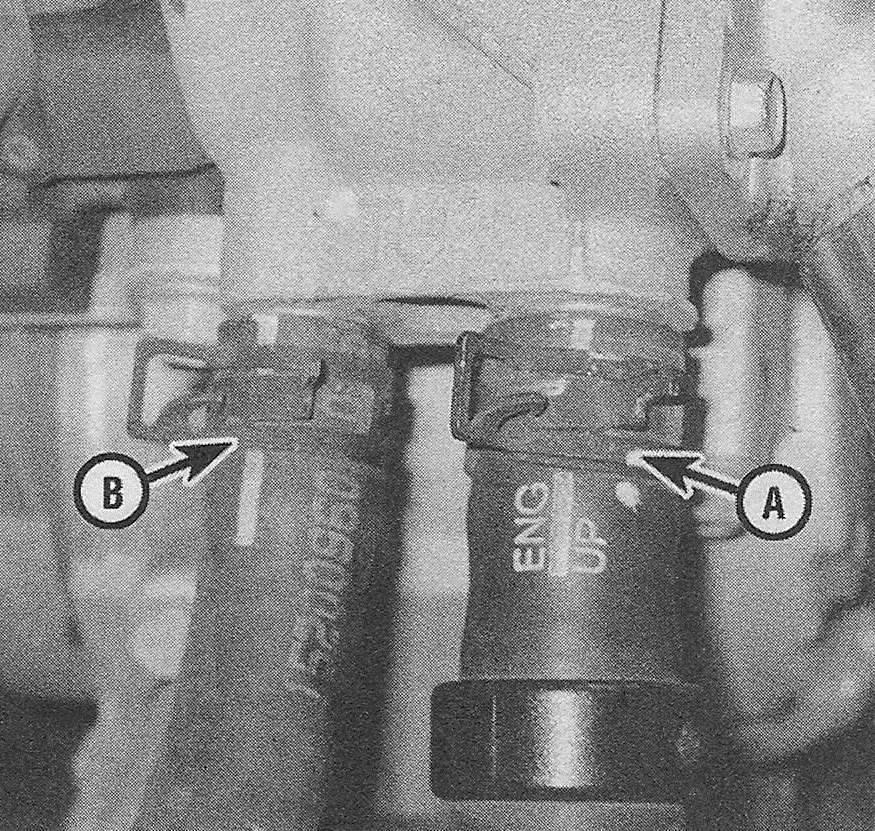
8. Remove the water pump outlet hose at the thermostat (see Valve covers — removal and installation) and the heater and expansion tank hoses (see illustration).
7.8 Disconnect the expansion tank hose ( A) and the heater hose (B)

9. If necessary for access, detach the cool- ant air bleed hose from the engine.
10. If a new water pump is to be installed, remove the thermostat housing (see Valve covers — removal and installation).
11. Unbolt the water pump (see illustration). It may be necessary to tap the pump with a soft-face hammer to break the gasket seal.
7.11 Water pump mounting bolts

All models
12. Remove all traces of the old gasket seal from the mounting surface on the engine. Do the same on the water pump if the same pump is going to be re-installed.
13. Clean the mounting bolt threads and threaded holes on the mounting surface to remove corrosion and sealant, if necessary.
14. Compare the replacement pump with the old one to make sure that they’re identical.
15. Place the gaskets and water pump into position. Use caution to ensure that the gasket doesn’t slip out of position. Install the mounting bolts until they are all finger tight.
16. Tighten the bolts to the torque listed in this Chapter’s Specifications.
17. The remainder of installation is the reverse of the removal procedure.
18. Refill the engine with coolant (see Tune-up and routine maintenance). Run the engine and check for leaks.