Suspension arms (rear) — removal and installation
Note: This procedure applies to models with coil spring rear suspension only.
Trailing arms
Warning: Remove and install only one arm at a time. This will prevent the axle housing from shifting on the jack.
1. Loosen the rear wheel lug nuts. Raisethe rear of the vehicle and support it securely on jack stands placed underneath the frame rails. Block the front wheels to prevent the vehicle from rolling. Remove the wheel (s).
2. If equipped with Autohide®, unbolt the height sensor linkage from the bracket on the trailing arm.
Note: Do not change the height sensor linkage adjustment or pry on it to detach it. Pivot the linkage up and support it to protect it from damage.
3. Support the rear axle with a floor jack, then remove the nuts, washers and bolts from each end of the trailing arm (see illustrations).
15.3a Upper trailing arm mounting fastener locations

15.3b Lower trailing arm mounting fastener locations

4. Remove the arm. Check the bushings in the arm for cracking, hardness or other signs of deterioration. If the bushings are in need of replacement, check with your local auto parts store or dealer parts department regarding the availability of replacement bushings. If replacement bushings are available, take the arm and the bushings to an automotive machine shop or other qualified repair facility to have the old ones pressed out and the new ones pressed in.
5. Installation is the reverse of removal. Before tightening the bolts/nuts, raise the rear axle with a floor jack to simulate normal ride height, then tighten the fasteners to the torque listed in this Chapter’s Specifications.
Track bar
6. Raise the rear of the vehicle and support it securely on jack stands placed underneath the frame rails. Block the front wheels to prevent the vehicle from rolling.
7. Detach the parking brake cable from the clips on the arm.
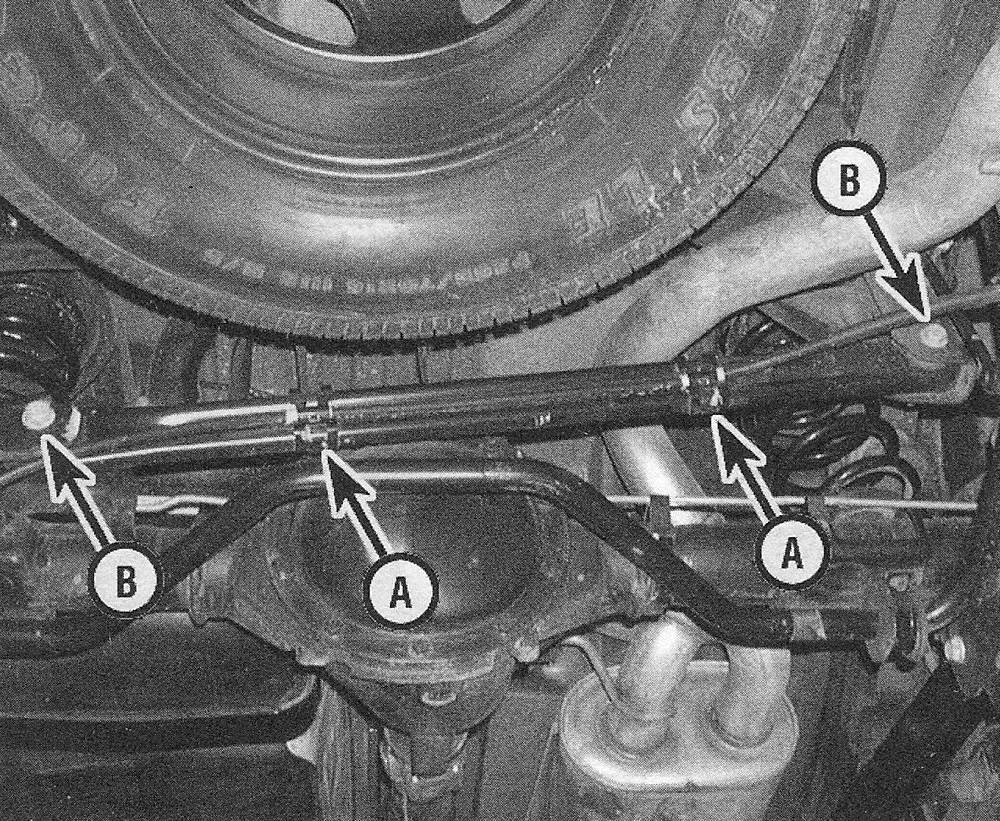
8. Remove the nuts/bolts from each end of the bar (see illustration).
15.8 Track bar mounting details
A Parking brake cable clip
B Mounting bolt

9. Remove the bar. Check the bushings in the bar for cracking, hardness or other signs of deterioration. If the bushings are in need of replacement, check with your local auto parts store or dealer parts department regard
regarding the availability of replacement bushings. If replacement bushings are available, take the bar and the bushings to an automotive machine shop or other qualified repair facility to have the old ones pressed out and the new ones pressed in.
10. Installation is the reverse of removal. Before tightening the bolts/nuts, raise the rear axle with a floor jack to simulate normal ride height, then tighten the fasteners to the torque listed in this Chapter’s Specifications.